
sourcing / BUYER DESK
Private-Label Artwork Handoff: Ride-On Sourcing Steps
Published 2026-10-20 · Updated 2026-10-20
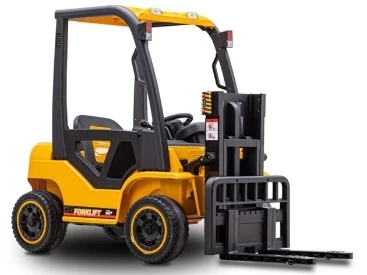
For private-label electric ride-on toys, artwork handoff is a sequence of locked fields, not a file drop: you confirm carton dieline, file format, color reference, print placement and label text sheet by sheet before the factory prints anything. Everything below is ordered so each step ends with a checkpoint and the exact question to put to the supplier.
One scope note before the steps. The catalog records used here are catalog records only. They establish no certification, infant suitability, licensing, stock or factory capacity, and material is recorded as "not recorded" for every SKU in the snapshot. Treat every commercial figure as reference-only and reconfirm sample, current quote, age evidence and destination documents before you commit tooling or print plates.
This checklist works for distributors running mixed programs — a ride-on tank line alongside drift cars — because the handoff failure modes are the same regardless of body style.
What the catalog record actually contains — and what it does not
The recorded fields for the scoped snapshot are narrow: product name, packing type, reference MOQ, units per carton, source size, source weight (gross and net) and a reference price. Artwork-specific fields — file format, color reference, dieline, print placement, label text — are absent from the record. That gap is the reason this handoff is a checklist and not a template.
Take the Ride-On Tank record: packing carton, reference MOQ 30, one unit per carton, source size 125*61*61, gross weight 25.9 kg against net 23.4 kg. Those numbers tell you carton footprint and handling, not what goes on the printed panel. A 25.9 kg gross weight on a single-unit carton is also the kind of figure that decides whether your carton art has to carry a manual-handling icon, so confirm it rather than assume it.
The same applies to the Electric Go-Kart Ride-On. It is one catalog entry in a program that spans several body styles, and its record carries the same missing material and artwork fields as the rest. Distinguish confirmed catalog entries from missing fields at every step, or you will approve art against a spec nobody verified.
Step 1 — Fix the dieline before anyone opens a design file
The dieline is the first field to freeze because every other artwork decision hangs off it. Ask for the current carton dieline as a vector file and confirm the carton dimensions on the dieline match the recorded source size for that SKU. If the dieline and the size record disagree, stop — the record may be stale.
Checkpoint: dieline dimensions reconciled against the recorded source size, in writing. Question to the supplier: "Send the current carton dieline as a vector file, and confirm in writing that its dimensions match the size recorded for this SKU."
Two packaging variants on the same order are the normal reason this step slips. If you are shipping one purchase order to two destinations with different retail language, the art differs but the dieline usually does not — freeze one dieline, then version the panels.
Step 3 — Stress-test the artwork for reproduction limits
Fine detail dies quietly in production. Small logos with tight detail can fill in, and closely spaced lines or letterforms can merge, so you need to test the art against the process before approval. Published artwork guidance for imprint work puts minimum line thickness at 1 point (0.014 inch) and non-printing or negative-space areas at 2 points (0.028 inch).
Checkpoint: no line under 1 point, no negative space under 2 points, and a redraw of any logo that does not survive at the actual print size. Question to the supplier: "At the print size on this carton, will this logo detail hold, or does it need to be simplified?"
Scale is the trap. A mark that reads cleanly on a large side panel can collapse on a narrow end panel, so evaluate each panel at its real dimensions rather than approving one view of the art.
Step 4 — Decide the proof level before plates are made
Virtual proofs are typically free; a physical printed production proof is a paid sample and normally excludes shipping. That price difference is trivial against the cost of scrapping printed cartons, but it is a real line item, so pick the level deliberately rather than by default.
Checkpoint: proof level chosen, named, and signed off in writing before production starts. Question to the supplier: "What proof do you provide — virtual only, or a physical printed proof — and what is the cost and lead time for each?"
Run the proof against the destination-market label content, not just the logo. Label text is the part most likely to change after legal review, and a proof that only validates color will not catch it.
Step 5 — Separate setup, run, and reorder charges from product cost
Imprint programs commonly price setup per location, with a lower setup for an exact-repeat reorder, plus a per-unit run charge that can step up for larger sizes. None of those numbers should be assumed to apply to electric ride-on cartons unless your supplier confirms them for your job — published imprint pricing belongs to the supplier that published it.
Checkpoint: setup, run, PMS matching and proof charges itemized separately from the unit price, with the reorder setup rate confirmed. Question to the supplier: "Quote setup, run, PMS matching and proof charges separately, and confirm the exact-repeat reorder setup rate."
Ask this before you sign the purchase order. Artwork charges that surface after the PO is issued are the easiest way to lose margin on a thin-margin ride-on program.
Step 6 — Reconcile the private label mark with mandatory label content
Your private-label mark shares the carton with mandatory label content, and the two compete for the same panel. Labeling control is a governed process covering master artwork, regulatory statements and variable data such as lot, GTIN and expiry, so the handoff must assign each element a place, not just a graphic.
Checkpoint: every mandatory element mapped to a panel with the private-label mark, and tracking label content — responsible party, production date and location, and batch or run number — confirmed as present. Question to the supplier: "Which label elements are mandatory for my destination market, and where on the carton will each one sit relative to my private-label mark?"
Keep product-safety evidence separate from commercial and transport documents, but make sure the product and model names match across test reports, certificates, invoices and supplier records. A mismatch there is what turns a clean handoff into a held shipment.
Worked example (illustrative, not a real shipment)
A distributor places one order of 600 units of a ride-on tank model, split 300 to a US warehouse and 300 to an EU warehouse. Same dieline, same body color, two retail-language panels and two different mandatory label sets. Reference MOQ for the SKU is 30 with one unit per carton, so this is 600 cartons and 600 label sets.
The carton art is approved at step 3 from a single panel view. At step 6 the EU panel turns out to need label content the US panel does not, and the private-label mark on that panel sits where the mandatory block has to go. The art is not wrong; it was approved against the wrong panel. Production holds at the print stage until the EU panel is relaid out — the US half could have shipped, but the order was cut as one run.
This is an invented scenario for illustration only. The failure point is step 6, and the fix is cheap at the checklist stage: map every panel's mandatory content before you approve any single view of the art.
What changed in the last 14 days
None found for this product. No artwork-handoff-specific regulatory or commercial change tied to electric ride-on SKUs surfaced in the last 14 days of review, so this checklist stays on the classic process rather than chasing a headline.
Two adjacent items are worth knowing but are not artwork rules. US importers of CPSC-regulated consumer products have been required since July 8, 2026 to electronically file certificate data with US Customs and Border Protection at entry, including low-value shipments, with a January 8, 2027 compliance date for goods entering from a Foreign Trade Zone. Separately, the Toy Association reported on September 29, 2026 that a US-China trade board designated multiple toy categories as non-sensitive products eligible for lower tariffs. Neither item changes what goes on your carton art, and neither confirms anything about the SKUs in this program.
For consumer-facing digital disclosure rules, official text reviewed here does not confirm an application date for this product category — do not treat any single date as the moment your cartons must change.
What this shipment should do
For this shipment, the document that matters is the signed artwork approval sheet — dieline, file format, color reference, panel-by-panel placement and proof level — attached to the purchase order and reconciled against the label content required at each destination. It is the one file that decides whether print goes ahead.
Keep it separate from the commercial and transport documents, and make sure the model name on it matches the name on the test reports and the invoice. Where a mandatory label element is unconfirmed for a destination, hold that panel rather than printing a version you will have to reprint.
Handoff steps, checkpoints and red flags
| Step | What to check | Red flag | Step 1 — Dieline | Dieline dimensions reconciled in writing against the recorded source size for the SKU | Dieline and recorded size disagree, or only a PDF image is supplied |
|---|---|
| Step 2 — File and color | Vector .eps or .ai in CMYK; PMS number plus CMYK breakdown where PMS is specified | Color given as "match our brand blue" with no reference system | |
| Step 3 — Reproduction limits | Minimum 1 pt lines (0.014 in) and 2 pt negative space (0.028 in) at actual print size | Art approved from one panel view only | |
| Step 4 — Proof level | Proof level named and signed off before production | Production scheduled with no proof step defined | |
| Step 5 — Artwork charges | Setup, run, PMS matching and proof charges itemized separately from unit price | Artwork charges first quoted after the PO is issued | |
| Step 6 — Label content | Mandatory elements and tracking label content mapped per destination panel | Private-label mark and mandatory block competing for the same panel | |
| Step 7 — Reconfirmation | Sample, current quote, age evidence and destination documents reconfirmed per SKU | Reference MOQ, size, weight or price treated as a quotation |
Sources
- artistictoy.com
- labeling control artwork claims changes
- requirements for importing childrens products into the united states 2026 checklist
- what safety standards should electric toys meet
Related Products & Categories
Next step
Work the checklist against one SKU first — a ride-on tank or a go-kart — and take it to your supplier as a written approval sheet rather than an email thread. Once the dieline, file format, color reference, panel placement and proof level are signed, the rest of the program copies across with only the panel content changing.